How to Submit a License Renewal Application
Download PDF
Visit the portal at https://dohlicensing.nj.gov/ and navigate to the top of the homepage.

Please follow the instructions provided below in order to submit the license renewal application on the portal.
- Please create an account on the portal. For instructions on how to create an account, please click here .
- Once the account is created, please sign in. For instructions on how to sign in, please click here .
- After signing into the portal, navigate to the menu bar and click on
 to access the list of facilities that have been assigned to you.
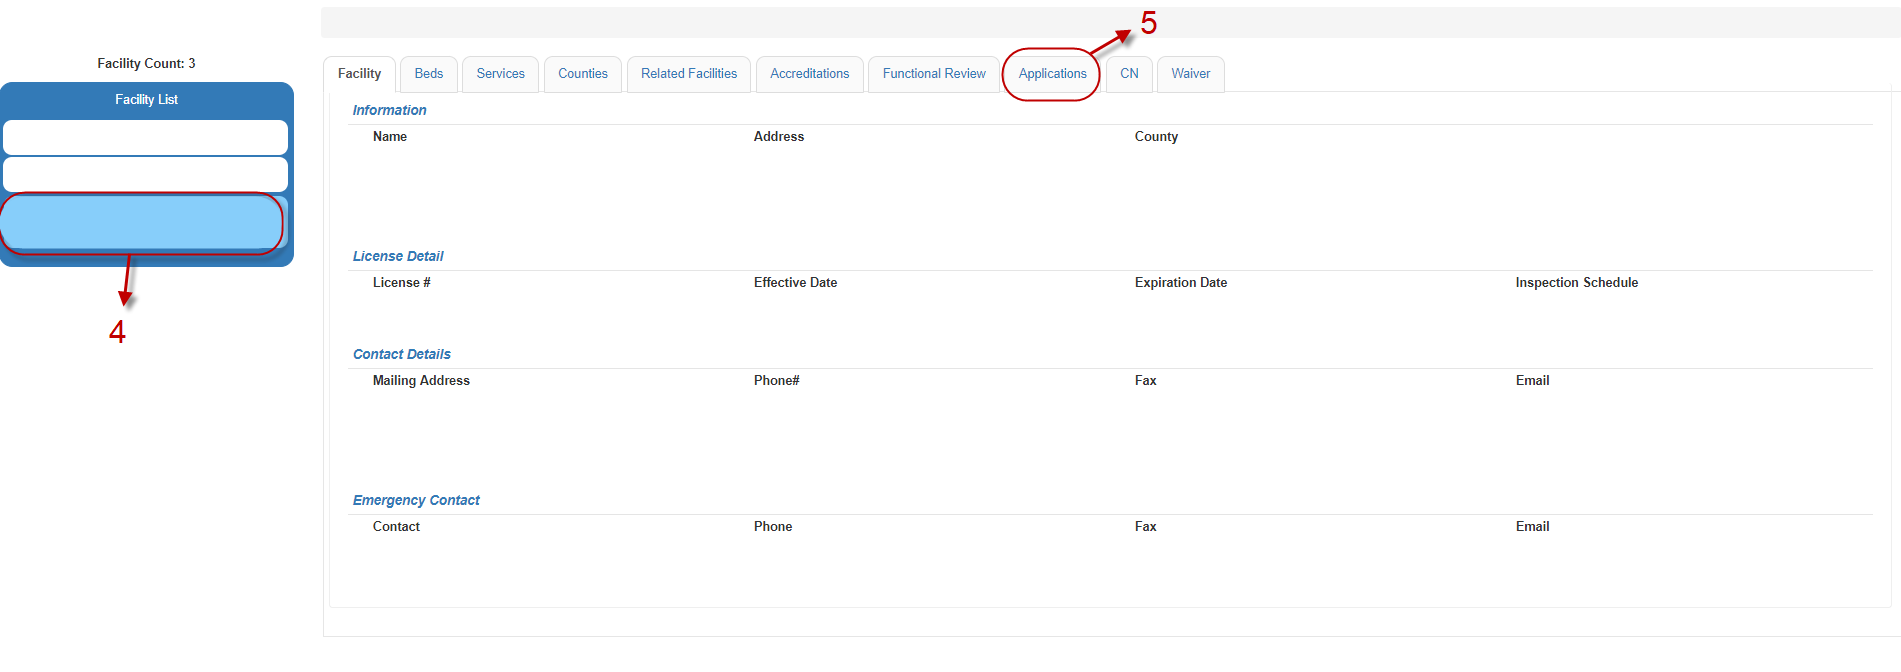
- Navigate to the left side of your screen to see the list of facilities that have been assigned to you. Click on the facility you would like to submit the renewal application for.
NOTE: If you are unable to see the facility you are assigned to, please call us at (609) 292-6552 or email us at HFSPortal@doh.nj.gov
- Now click on the applications tab.
- Next, click on the
 button and then click on Application Renewals.

- After clicking on application renewals, facility information will be displayed. Please review the facility information on the page and make appropriate corrections as needed.
Please note any field with an asterisk* is required for a final submission of the application.
Finally, click on  to update the facility information page and then click on
  to proceed to the next part of the application.
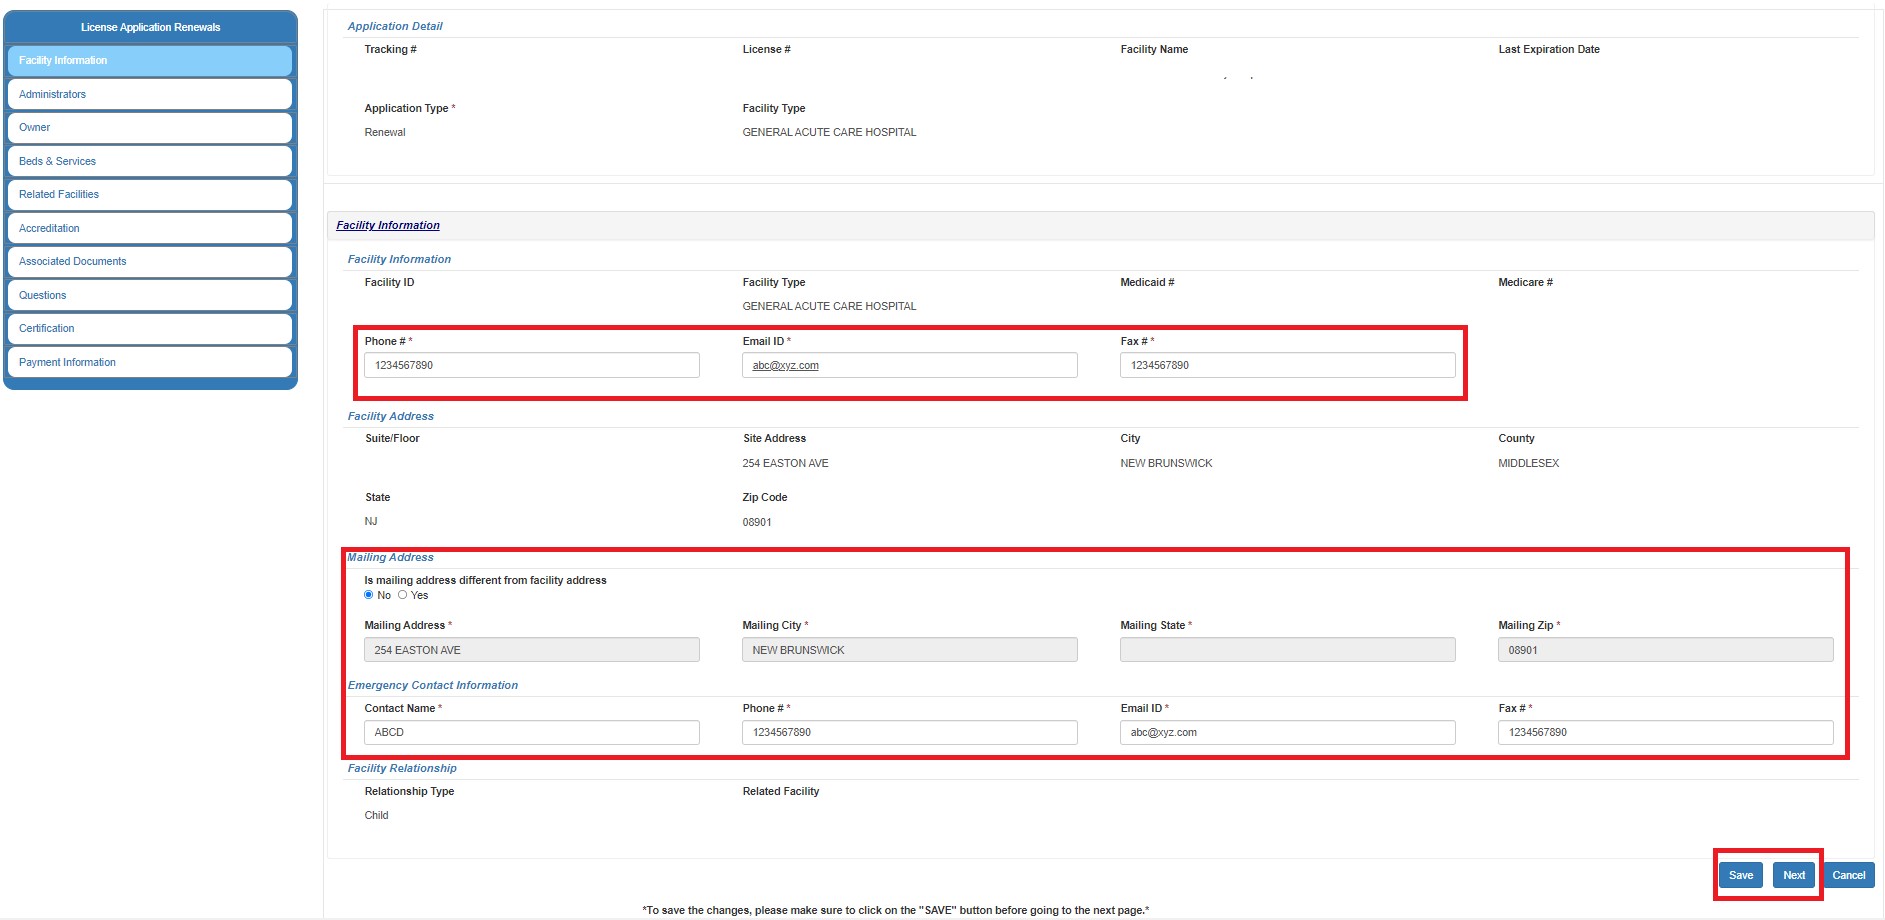
NOTE: Only some fields are editable on this page. If you want to edit anything else, an amendment application will be required to be submitted separately.
NOTE: Do not forget to click . If the page is refreshed or the browser back button is clicked prior to saving, the updated information will be lost, and you will need to re-enter it.
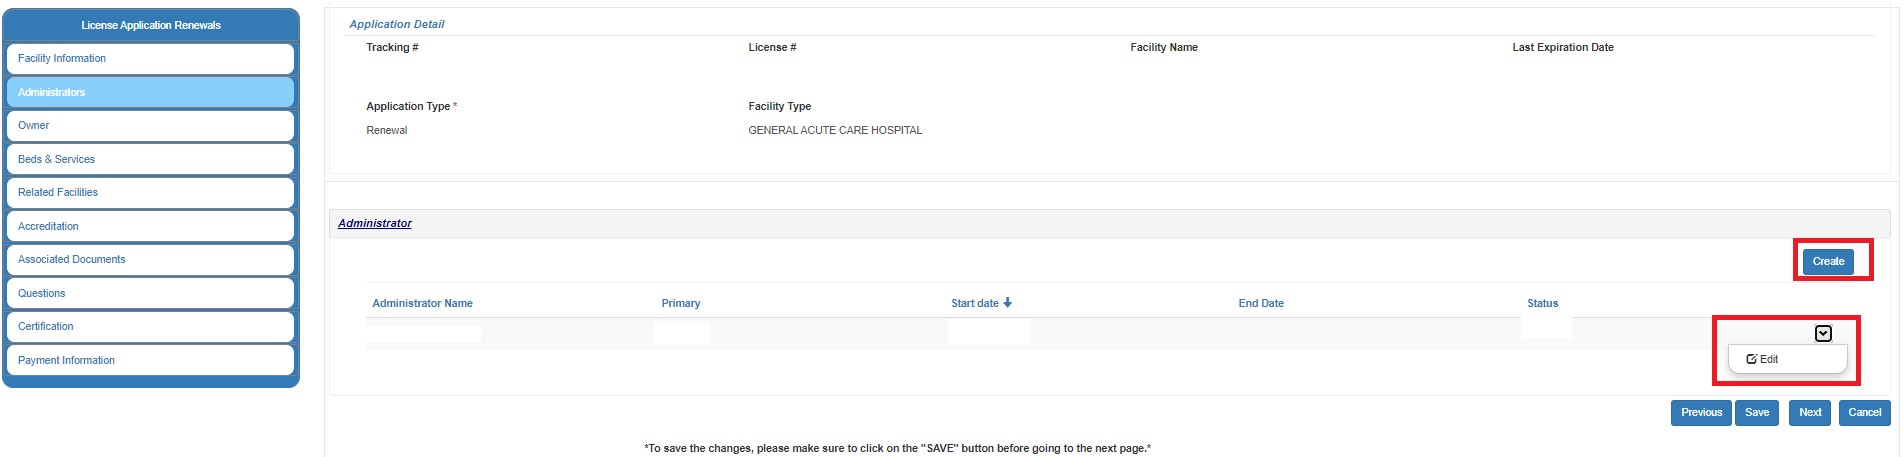
- On the administrator page, you can create an administrator by clicking on the
 button or you can edit an existing administrator by clicking on the button and clicking edit. Do not forget to submit the form after creating or editing an administrator.
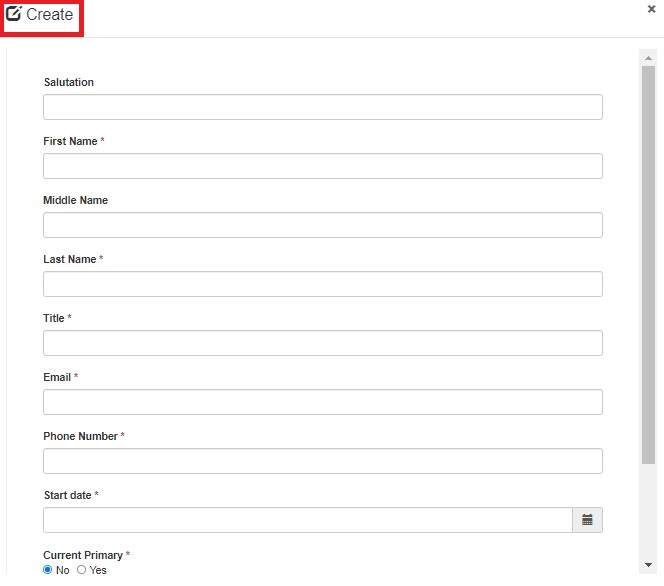
8.1 Fill out the form and click on  at the end of the form to create a new administrator.
Please note any field with an asterisk* is required for submission.
8.2 To edit an existing administrator, click on button and then click on edit. Whenever editing an administrator, if you select current primary as no, end date will need to be provided.
Fill out the form and click on at the end of the form to submit the changes.
Please note any field with an asterisk* is required for submission.
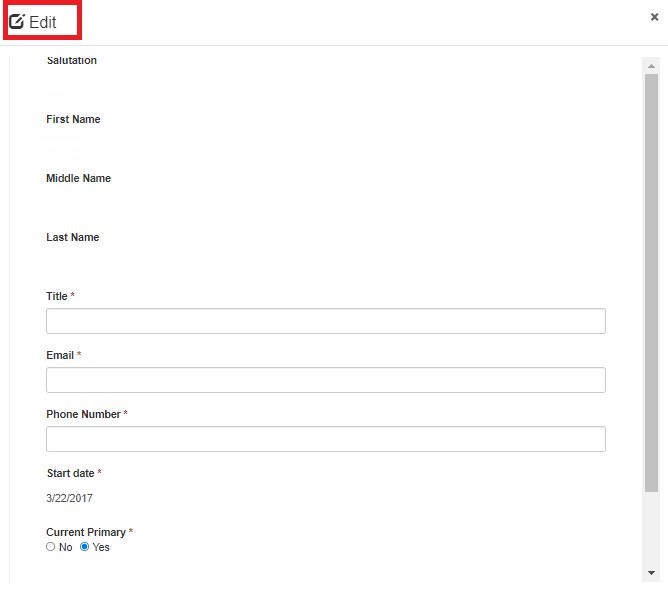
NOTE: You need to have one primary administrator to final submit the application. You cannot have multiple primary administrators.
NOTE: Do not forget to click . If the page is refreshed or the browser back button is clicked prior to saving, the updated information will be lost, and you will need to re-enter it.
- Clicking on will take you to the owner page of the application process. On this page you can edit some of the owner details by clicking on the button.

- 9.1 Verify the Company Name and Company Tax ID (EIN). If Company Tax ID (EIN) is blank, please fill in the information. Then fill in the other fields and click on to save.
- Then click on
 to go back to the application. You will get a pop-up asking for confirmation to close the window. Select OK to close the window and get redirected back to the application.
- Please note any field with an asterisk* is required for a final submission of the application.
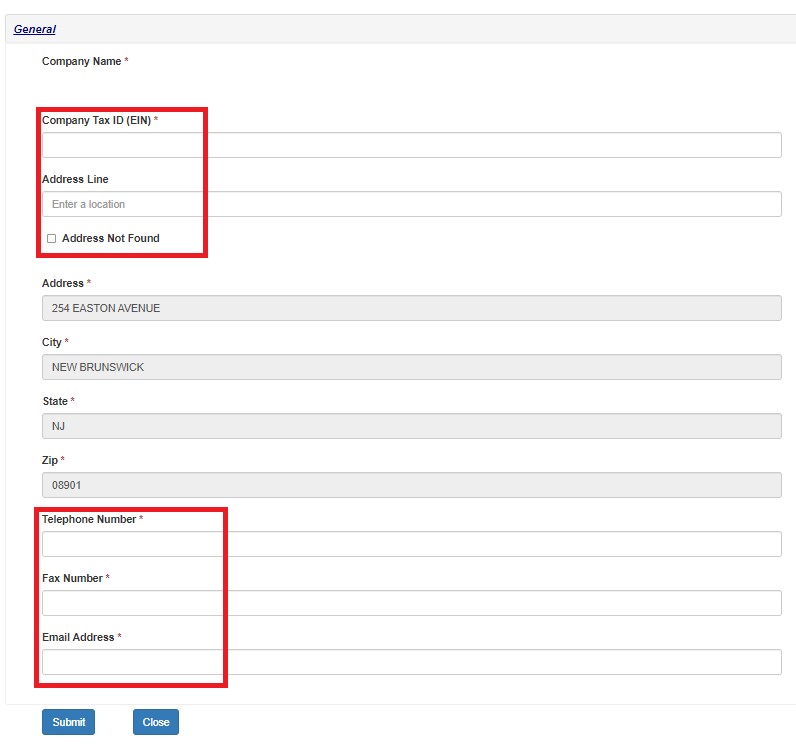
NOTE: Click on Address Not Found checkbox to enter the address manually.
NOTE: Do not forget to click . If the page is refreshed or the browser back button is clicked prior to saving, the updated information will be lost, and you will need to re-enter it.
- Clicking on next will bring you to the “Beds & Services” page.
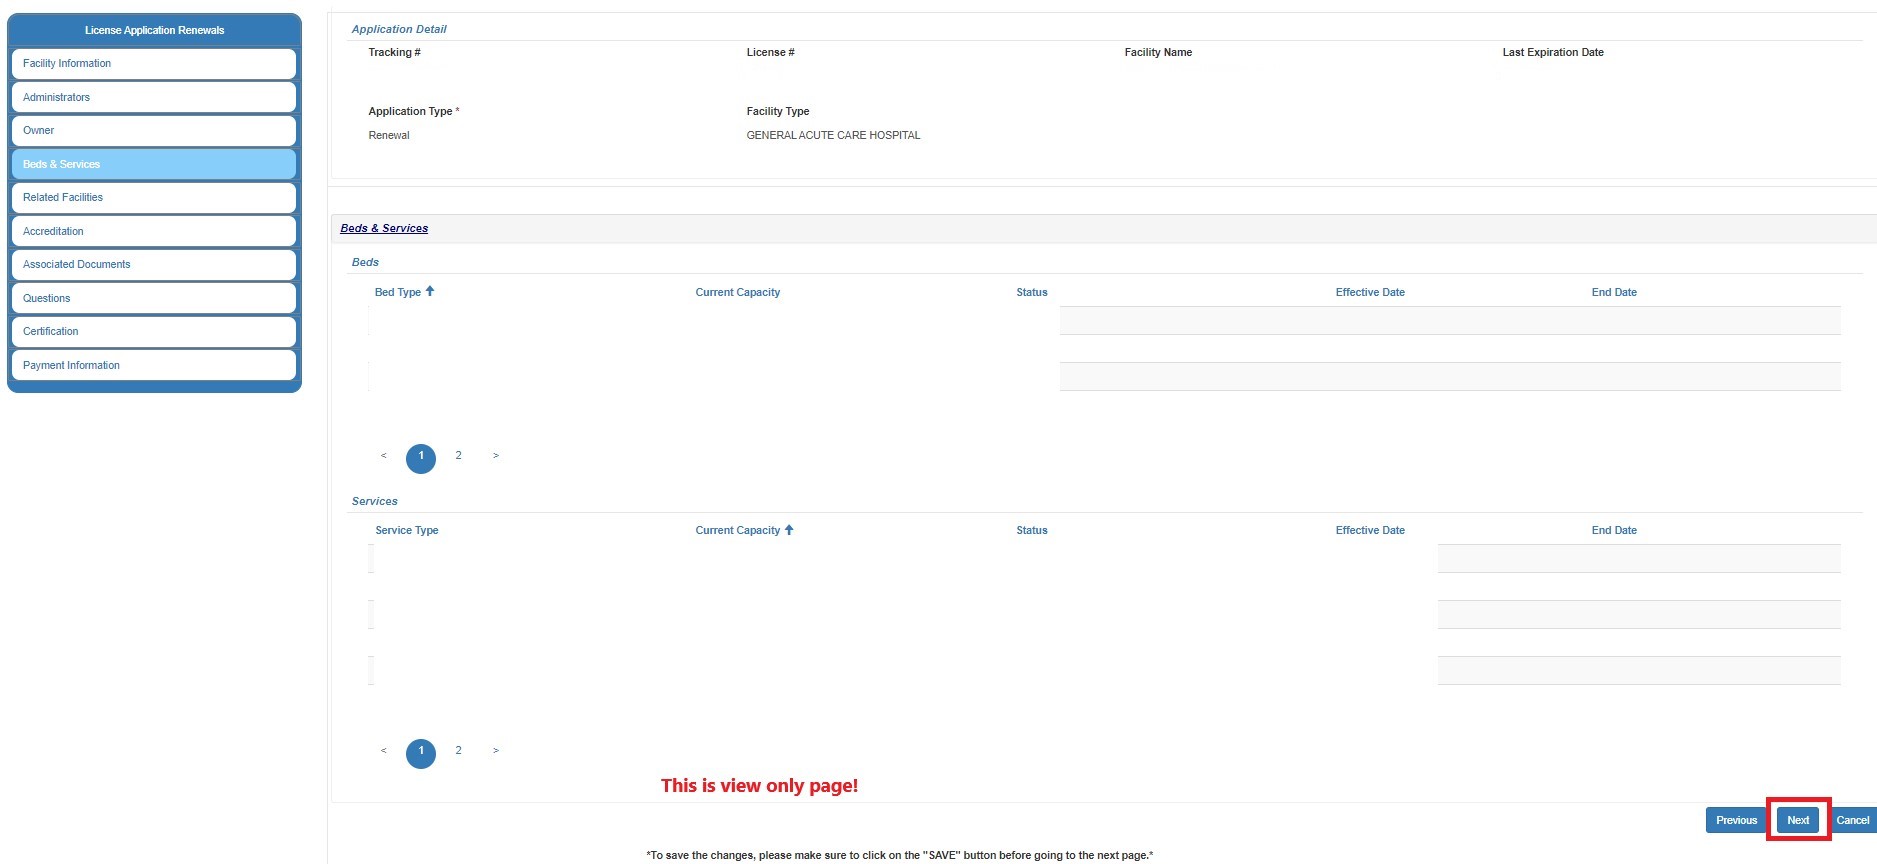
NOTE:This is a view-only page!
- Clicking next once more will take you the “Related Facility” page.
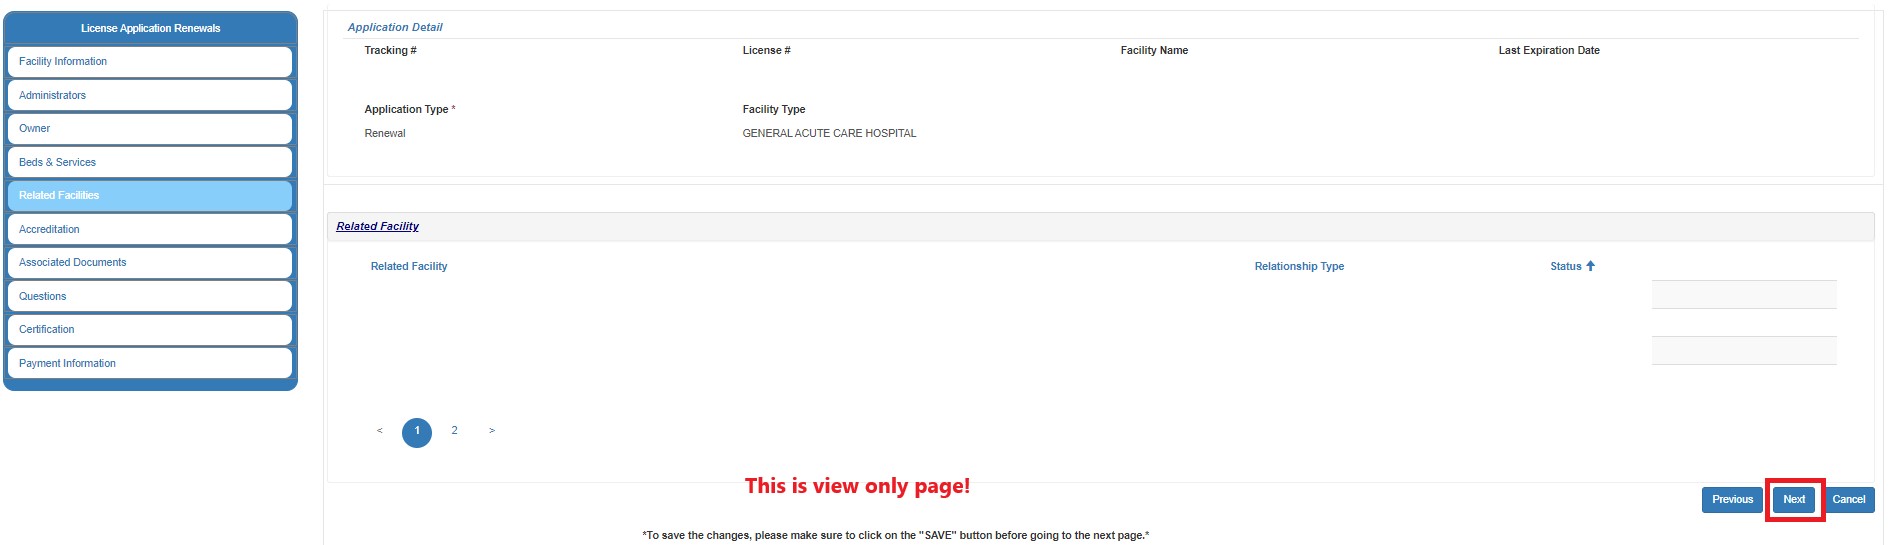
NOTE:This is a view-only page!
- Clicking on next again will take you to "Accreditations" page. Here you can click “Add/Create” button or "Edit/Activate" button.
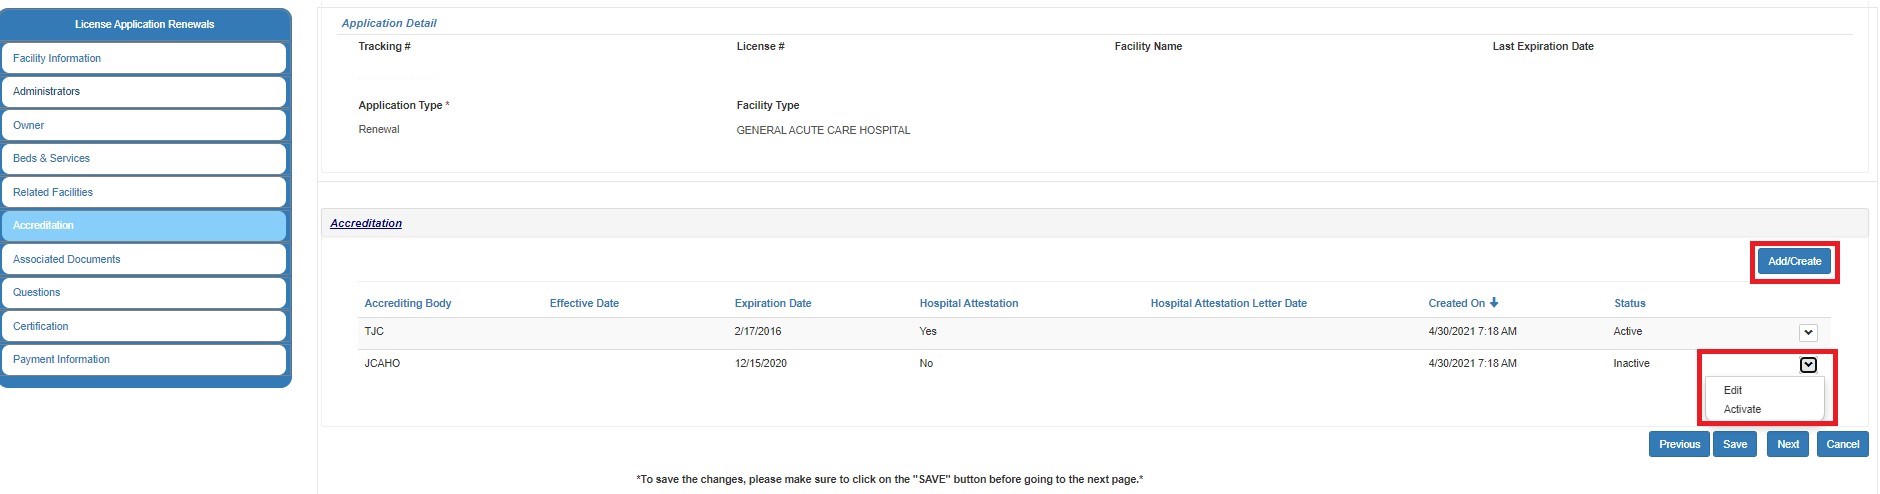
12.1 Adding Accreditation
12.1.1 Upon clicking on “Add/Create” button, create form will open up. Here you can input the accreditation information of the facility.
Hospital Attestation field will be “Checked” by default, showing Hospital Attestation Letter Date field as mandatory.
User needs to check off the “I certify that the…” sentence before moving to save/submit the record.
Once all data entry is done, please click on “Submit” to save the information and go back to the portal renewal application.
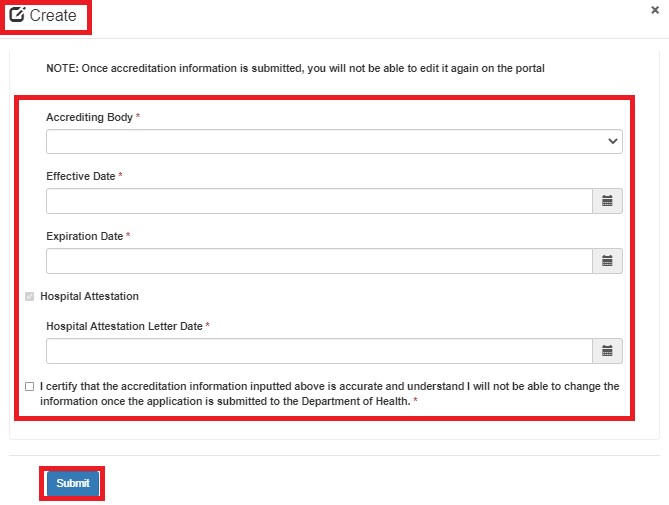
NOTE:
- Only one record can be created for each accrediting body.
- For example: If “TJC” is already added as the accrediting body, system will not display TJC as part of the accreditation list in the dropdown.
- Hospital Attestation & Hospital Attestation Letter Date fields are only shown for facility types that are classified as a hospital.
12.2 Editing Accreditation
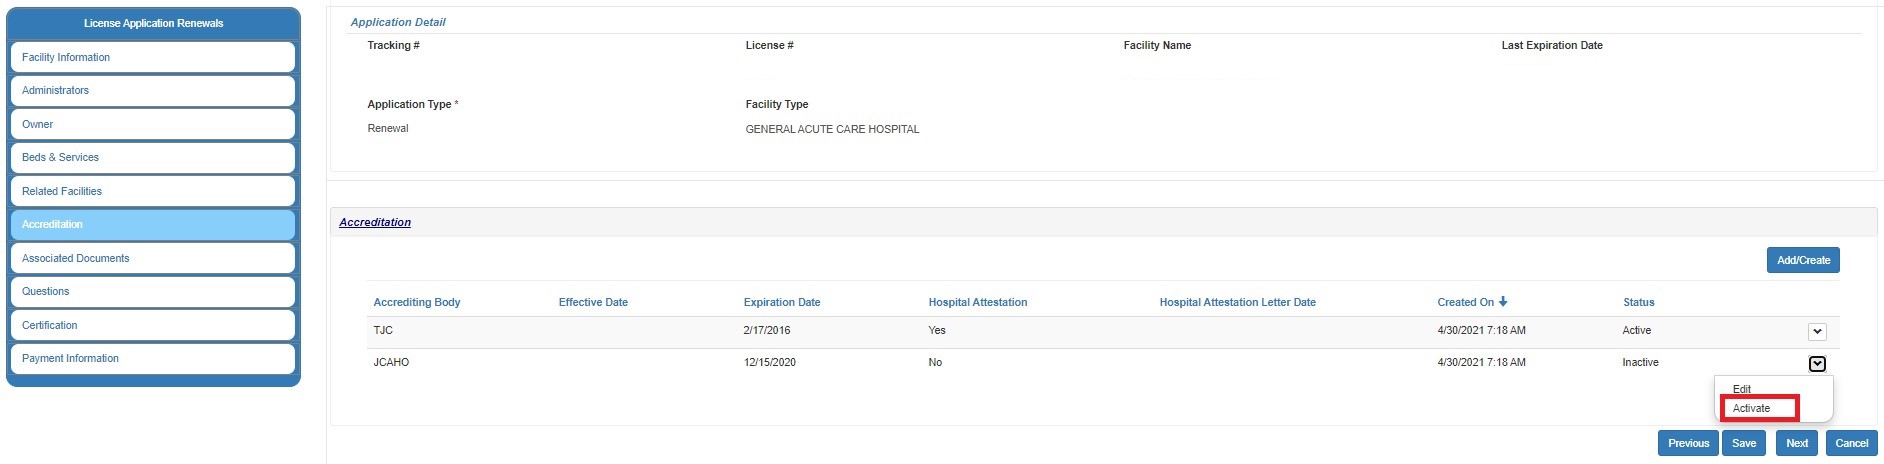
12.2.1 Check whether the record is “Active” or “Inactive” under the status column.
If the record is inactive, you first need to activate it by clicking on the down arrow and then clicking on “Activate” before trying to edit the record.
If record is already active/once record is activated, you will be able to edit/update the information by clicking on the “Edit” button

Once “Edit” button is clicked, user can update the effective date, expiration date and hospital attestation letter date on the edit form.
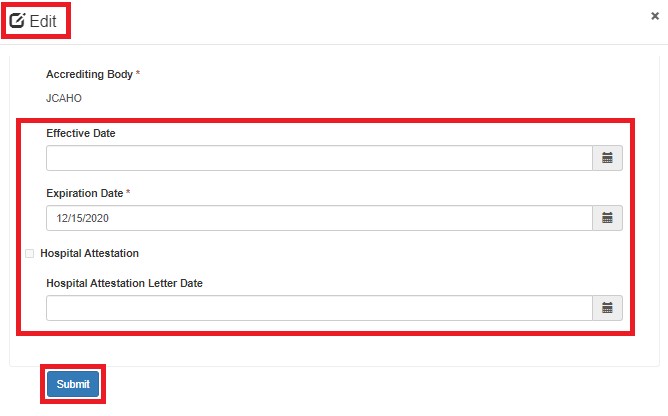
Once all data entry is done, please click on “Submit” to save the information and go back to the portal renewal application.
NOTE:
Hospital Attestation Letter Date field is mandatory to submit the updated information.
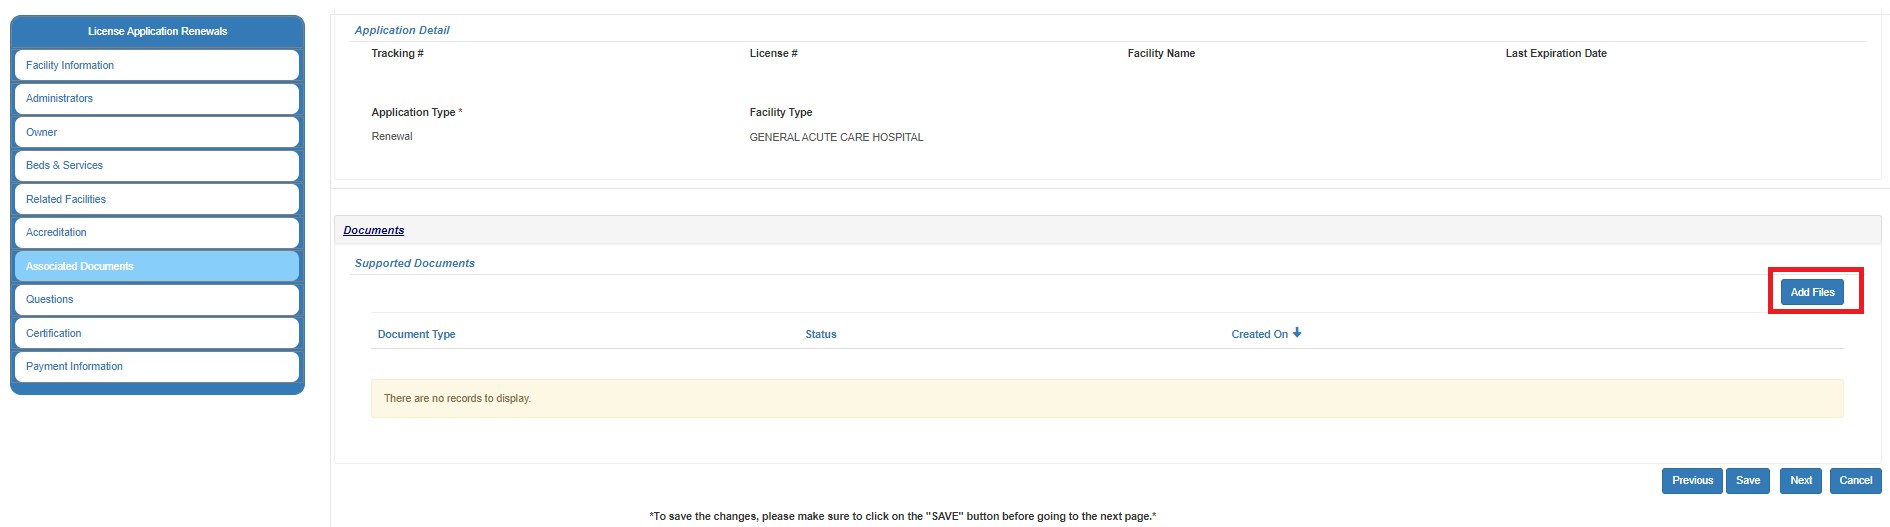
13. After viewing the information on Related Facility page, next step in the application is to add supporting documents, if needed. To add files, click on  button.
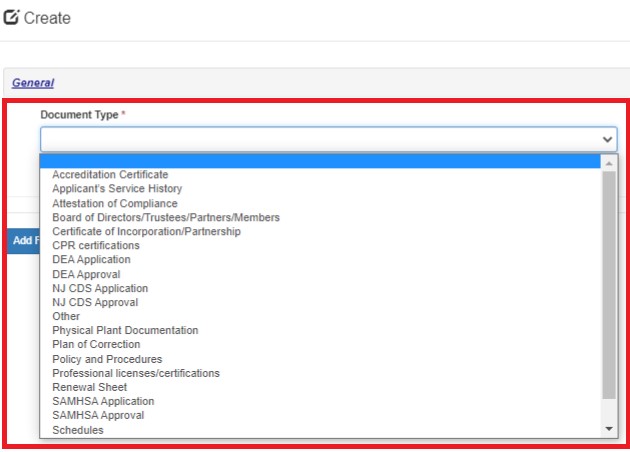
- 13.1 Then select the document type and click on
 button to proceed.
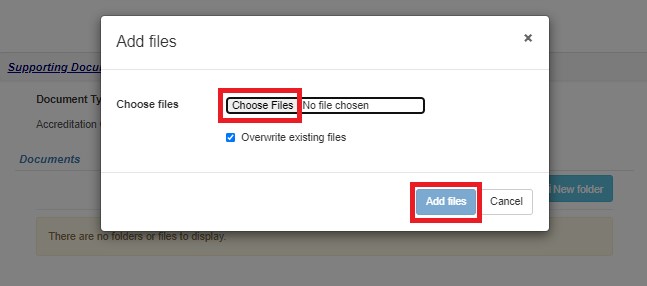
- 13.2 Next click on
 button and select one or more files from your computer. After selecting the file(s), click on button to upload them to the selected document type.
- 13.3 After selecting the files, you can click on
 button to proceed. You can also add a new folder by clicking on
  button and add files within that folder.
- Lastly, you can also delete a file if it was uploaded accidentally.

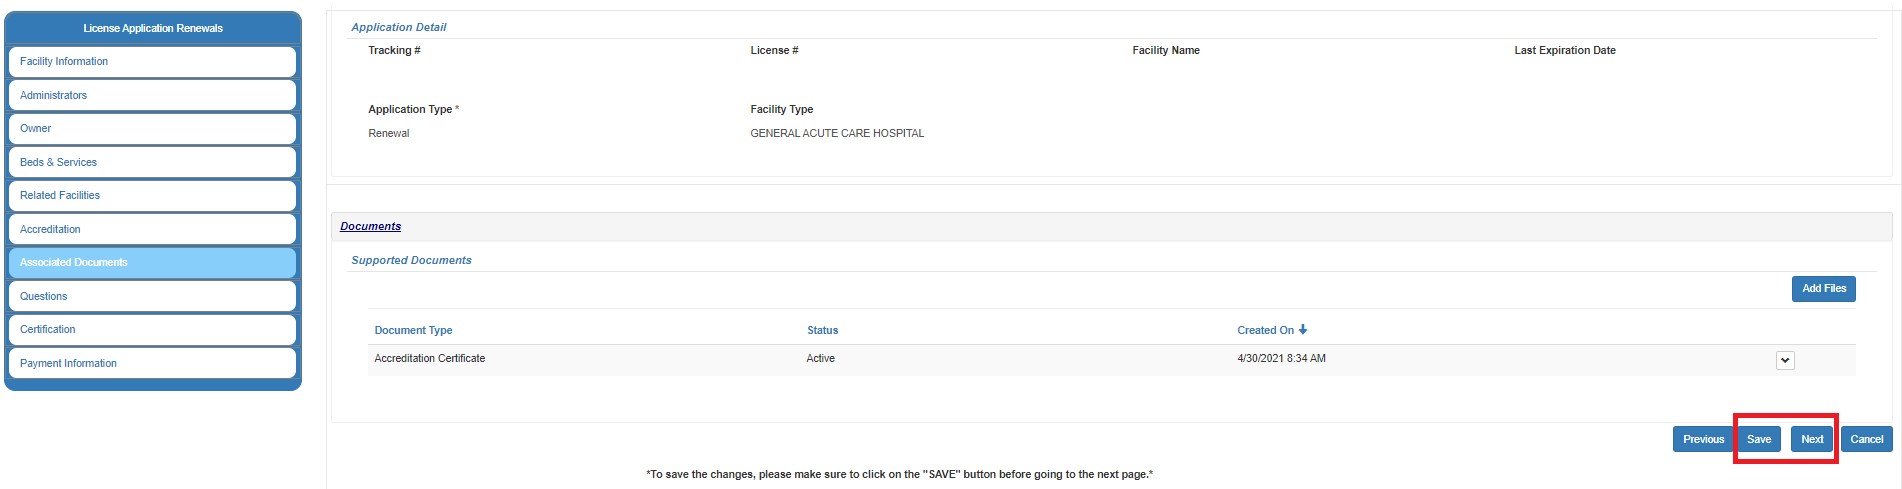
- 13.4 Repeat Step 13.3 for each document type as needed. After adding all the required documents, you can proceed by clicking on and then clicking on .
NOTE:
- Each document type requires at least one file to be uploaded within it in order to do a final submission of the application.
- A document type cannot be deleted when there are files/folders within that document type. You will need to delete the content inside first and then retry deleting the document type.
NOTE: Do not forget to click . If the page is refreshed or the browser back button is clicked prior to saving, the updated information will be lost, and you will need to re-enter it.
14. After uploading and saving the supporting documents, clicking will take you to a list of questions. Please select the appropriate response for each question and provide details, if answered Yes to any question. 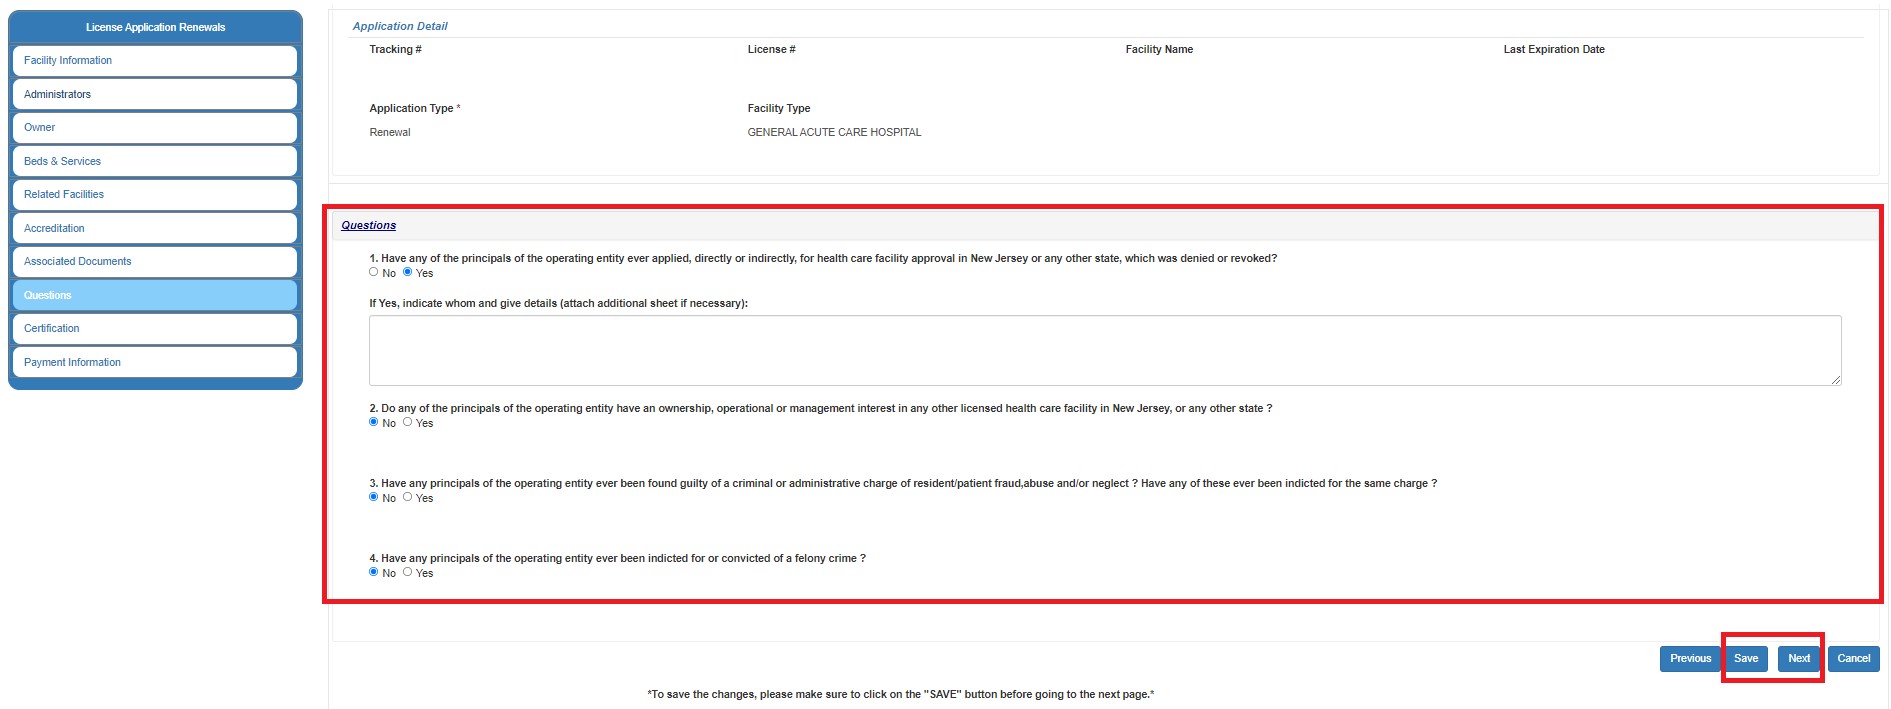
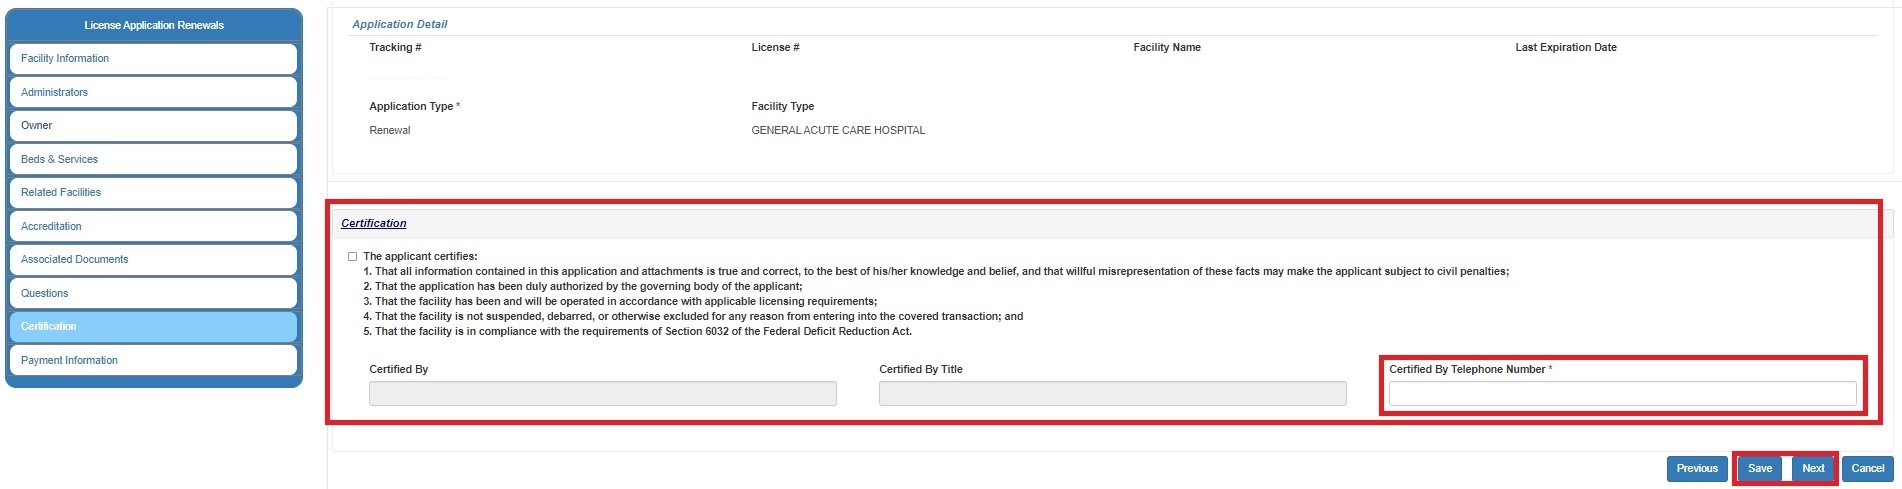
15. After answering the questions, the next step is to certify the application by clicking the checkbox shown in the image below. The checkbox will auto-fill your name and title. NOTE: Telephone number is required to proceed.
16. Next step in the renewal application process is the payment information page. On this page, please review the Total Due, Total Paid, Balance Due, Total Pending Payment, and Pending Balance Due. Refer below for more information.
Total Due: Total amount that is due calculated by adding application fee, inspection fee, and beds fee.
Total Paid: Total amount that has already been paid and posted to the application.
Balance Due: This is the amount that is currently due for the application. This amount does not include payments that are in transit and yet to be received, verified, and posted to the application.
Total Pending Payment: This is the total of payments that are in transit. Ex. Checks/Money Orders (refer to step 15.1 for more information)
Pending Balance Due: This is amount that needs to be paid in order to submit the application.

Note: If Pending Balance Due is 0 or less than 0, button will not be displayed, and E-Pay method will not be available.
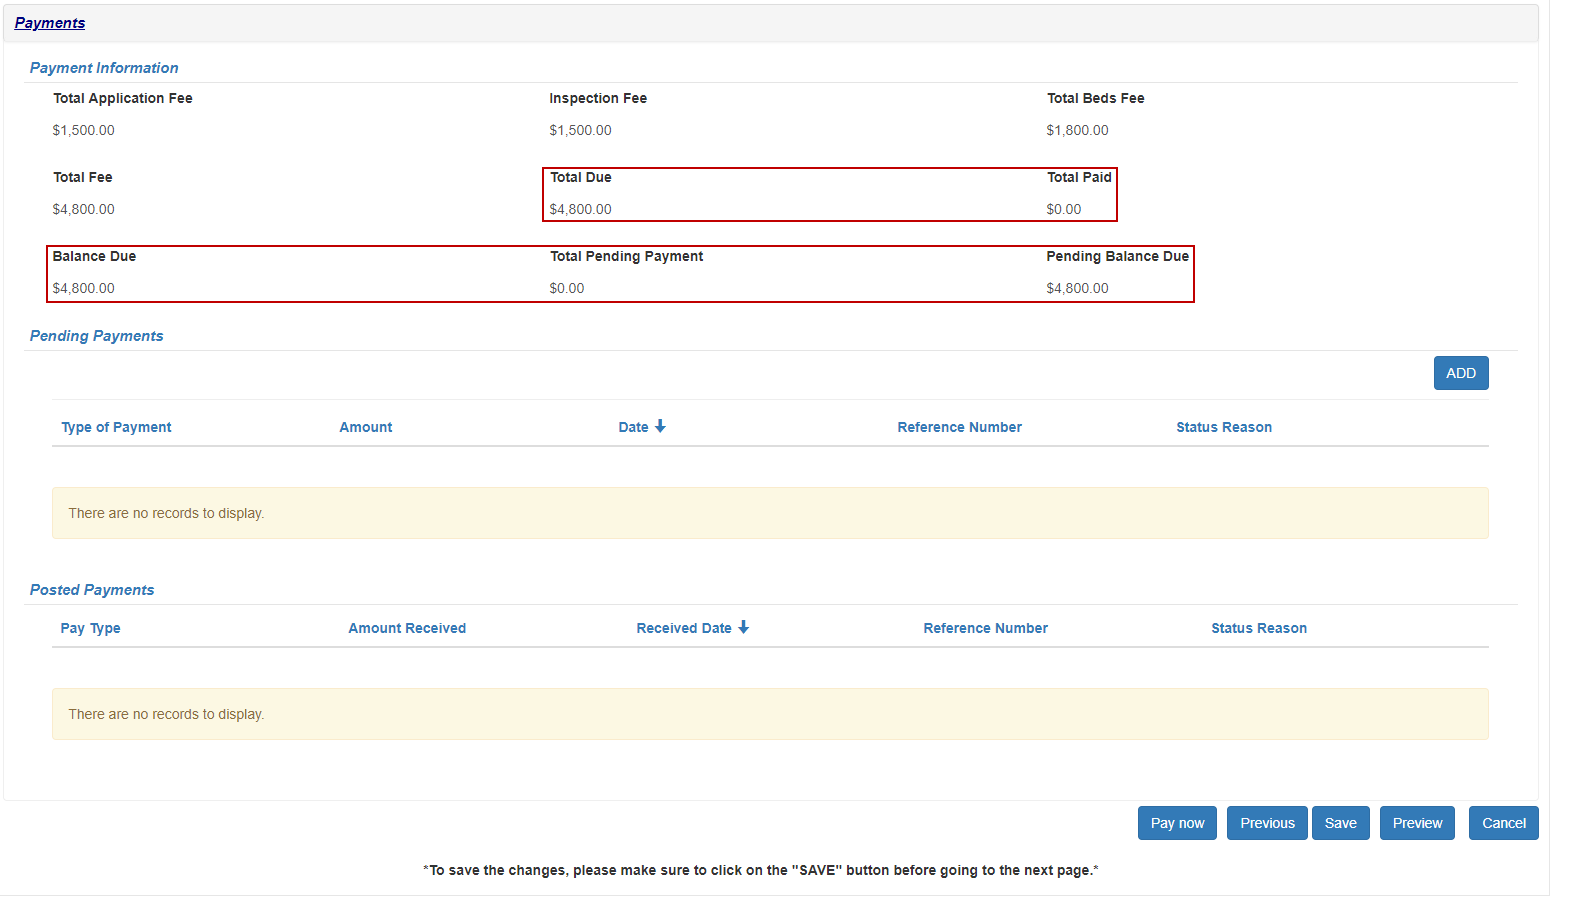
16.1 To pay, you can either pay “Pending Balance Due” through button or click  button to add a pending payment that will be sent, or to notify us of a payment that is in transit and needs to be linked to this application .

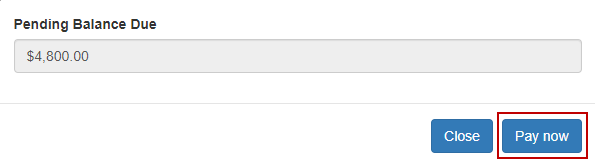
Clicking will pop up a message to verify the amount. Click on again to be redirected to the E-Pay website.
Once the payment process is complete on the E-Pay website, you will be redirected back to the portal application to verify and final submit the application.
For more information on how to navigate E-Pay website please refer to E-Pay guide below.
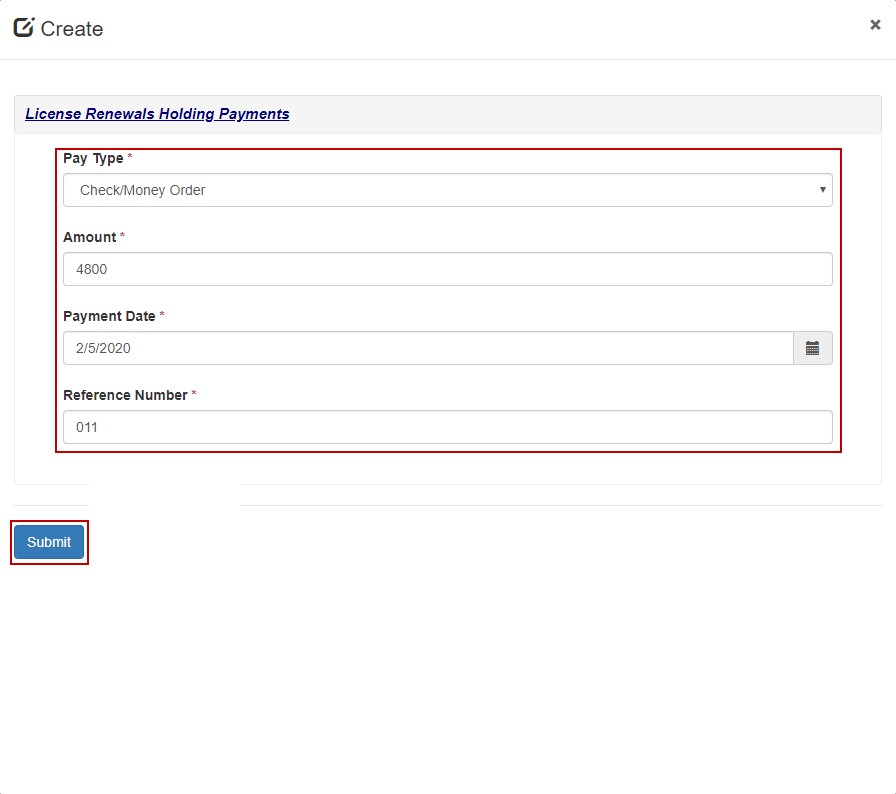
On the License Renewal Holding Payment form, please select your Pay Type (Check/Money Order, Wire, E-Pay etc.), provide the Amount, the Payment Date (date that is on the check/money order/E-Pay transactions),
and a Reference Number to help link/track the payment (Check #, E-Pay confirmation # or tracking #) and then click on the button to submit the form and create a record.
After submitting the form, a record should be created under Pending Payments section. Once the Pending Balance Due is 0 or less than 0 then only will you be able to final submit the application.
You can also edit the record by clicking on the button and clicking edit. You can edit the Pay Type, the Amount, Payment Date, and the Reference Number. The record can also be deleted by clicking on delete.

After verifying the Pending Balance Due is 0 or less than 0, click on and then  to review the completed application.
NOTE: Once the pending payment is verified by NJ DOH, the payment record will be shown under the Posted Payments section instead of Pending Payments section.
17. After reviewing the information on the preview page, please click on to do a final submit of the license renewal application.
NOTE: If there are any errors in the application, you will not be allowed to submit the application. Please fix the errors and proceed to submit again.
